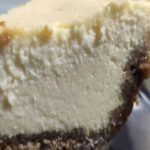
Yield: 1 (9-inch) Cheesecake, or 8-10 slices
Prep Time: 20 minutes
Cook Time: 45-50 minutes
Chill Time: 4 hours (minimum), preferably overnight
Total Time: 5 hours 5 minutes (plus chilling)
Difficulty: Intermediate
Intensity: Low-Moderate Effort, High-Reward Result
Equipment
-
9-inch Springform Pan (essential for easy removal)
-
Stand Mixer or Electric Hand Mixer
-
Large Mixing Bowl
-
Medium Mixing Bowl
-
Small Microwave-safe Bowl or Saucepan
-
Spatula
-
Aluminum Foil
-
Roasting Pan (for water bath)
Ingredients
For the Crust:
-
1 ½ cups Pork Panko (or crushed pork rinds)
-
5 tbsp Unsalted Butter
-
1 large Egg Yolk (optional, for binding)
-
Pinch of Salt
For the Filling:
-
24 oz (three 8 oz blocks) full-fat Cream Cheese, softened to room temperature
-
3 large Eggs, room temperature
-
1 cup Heavy Whipping Cream
-
1 tsp Vanilla Extract (optional, strictly carnivore-purists can omit)
-
¼ tsp Salt
Instructions
Step 1: Prepare the Pan and Preheat
Preheat your oven to 325°F (160°C). Take a large piece of aluminum foil and wrap it securely around the outside bottom and sides of your springform pan. This is a crucial step to prevent water from the water bath seeping into the pan. Lightly grease the inside of the pan with butter.
Step 2: Create the Savory “Graham Cracker” Crust
In a medium microwave-safe bowl, melt the 5 tablespoons of butter. Place the pork panko or crushed pork rinds into the bowl with the melted butter. Add a pinch of salt and, if using, the egg yolk. Mix thoroughly until the mixture resembles wet sand and all the crumbs are coated.
Transfer the mixture to your prepared springform pan. Press it down firmly and evenly into the bottom of the pan, using the bottom of a flat glass or measuring cup to create a compact, even layer. Par-bake the crust for 8-10 minutes until just set and slightly fragrant. Remove from the oven and set aside. Reduce the oven temperature to 300°F (150°C).
Step 3: Craft the Luxurious Filling
In the bowl of your stand mixer (or a large bowl if using a hand mixer), add the softened cream cheese. Beat on medium speed for 2-3 minutes until it is completely smooth, creamy, and free of any lumps. Scrape down the sides of the bowl with a spatula to ensure everything is incorporated.
With the mixer on low, add the eggs one at a time, fully incorporating each egg before adding the next. Scrape down the bowl again.
Slowly pour in the heavy whipping cream while the mixer is running on low. Add the salt and optional vanilla extract. Increase the speed to medium and mix for another 1-2 minutes until the filling is homogenous, velvety, and slightly airy. Do not overmix.
Step 4: The Water Bath for a Flawless Bake
Pour the filling over the pre-baked crust and smooth the top with a spatula.
Place the foil-wrapped springform pan into a large roasting pan. Carefully transfer the entire setup to the oven rack. Pour hot (near-boiling) water into the roasting pan until it comes about halfway up the sides of the springform pan. This water bath is the secret to a perfectly cooked cheesecake—it ensures gentle, even heat, preventing cracks and yielding an incredibly creamy texture.
Step 5: Bake and Cool with Patience
Bake for 45-50 minutes at 300°F (150°C). The cheesecake is done when the edges are set but the center still has a slight jiggle—like Jell-O—when you gently shake the pan. The center should not be liquid.
Turn off the oven, crack the oven door open, and let the cheesecake sit in the cooling oven for 1 hour. This gradual temperature change is another key step to prevent cracking.
Remove the cheesecake from the water bath and let it cool completely on a wire rack for another 1-2 hours. Then, cover it with plastic wrap and refrigerate for at least 4 hours, but ideally overnight. This extended chilling time is non-negotiable; it allows the cheesecake to fully set and develop its flavor and texture.
Step 6: Serve and Enjoy
Run a thin knife around the edge of the cheesecake before unclasping and removing the springform ring. Slice with a sharp, thin knife dipped in hot water for clean cuts. Serve cold and enjoy the rich, creamy, and satisfying proof that the carnivore diet can indeed include dessert.
Notes & Tips for Success
-
Room Temperature is Key: Using room temperature cream cheese and eggs is the single most important tip for a smooth, lump-free filling. Cold ingredients are the primary cause of a lumpy batter.
-
Crushing Pork Rinds: If you can’t find pork panko, place regular pork rinds in a zip-top bag and crush them finely with a rolling pin until they reach a breadcrumb-like consistency.
-
Flavor Variations: While not strictly carnivore, a small amount of citrus zest (lemon or orange) can be added to the filling for a bright note. For a keto-friendly version, a sugar-free sweetener like allulose or monk fruit can be added to taste (start with ½ cup).
-
Storing: This cheesecake will keep, covered tightly in the refrigerator, for up to 5 days. It can also be frozen for up to 2 months. Thaw overnight in the refrigerator before serving.
Nutrition Information
(Disclaimer: The following is an estimate based on the specific ingredients used. Values can vary.)
Serving Size: 1 slice (1/10th of cheesecake)
Calories: 485
Total Fat: 48g
-
Saturated Fat: 28g
Cholesterol: 195mg
Sodium: 380mg
Total Carbohydrates: 2g -
Dietary Fiber: 0g
-
Net Carbs: 2g
-
Sugars: 2g (naturally occurring from the dairy)
Protein: 10g
The Carnivore Breakdown: This recipe is a powerhouse of animal-based nutrition. It is exceptionally high in fat, providing a sustained energy source, and contains a moderate amount of protein. With virtually zero carbohydrates and no plant-based ingredients or artificial sweeteners, it is perfectly aligned with the goals of the carnivore diet. The high fat content also makes it incredibly satiating, ensuring a small slice goes a long way.

Hayyat is a talented content writer and digital marketer with expertise in SEO, social media management, and online marketing. She excels at creating impactful, data-driven content to help businesses connect with their target audience and achieve measurable outcomes.


