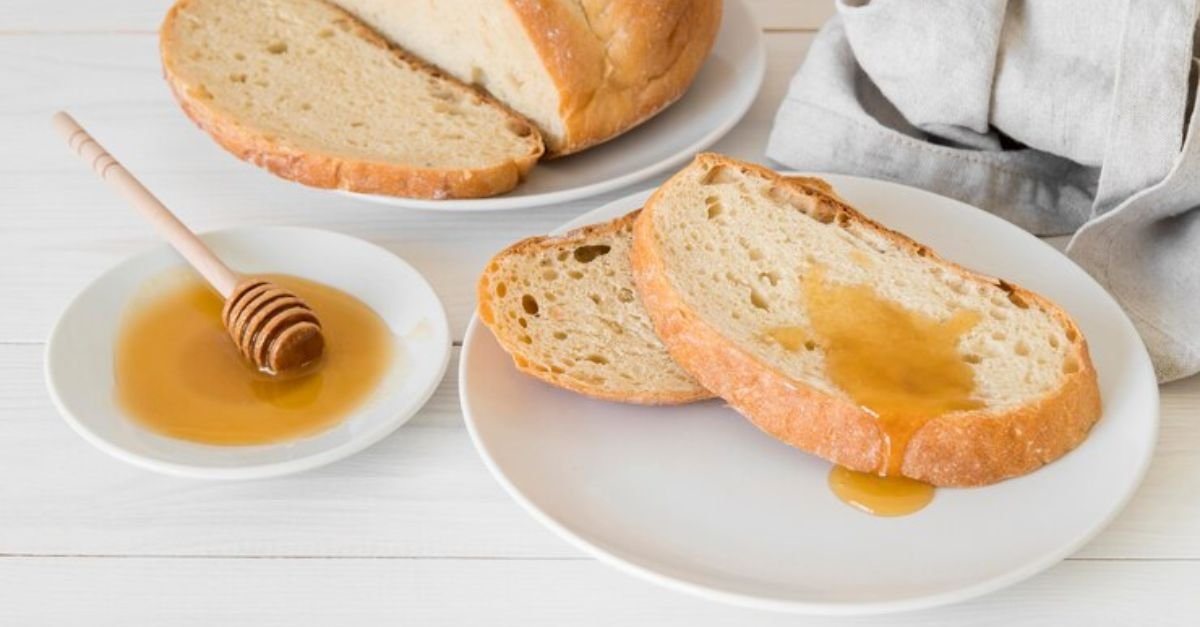
This bread is perfect for breakfast or as a side for soups and stews. The addition of honey and buttermilk gives it a slightly sweet and rich flavor with a soft and tender crumb. It’s wonderful when served warm with a pat of butter or jam!
Ingredients:
- 3 cups all-purpose flour
- 2 tablespoons honey (plus extra for drizzling)
- 1 tablespoon active dry yeast
- 1 teaspoon salt
- 1 cup buttermilk (room temperature)
- 1/4 cup warm water (110°F/43°C)
- 2 tablespoons unsalted butter, softened
- 1 tablespoon vegetable oil (or any neutral oil)
- 1 teaspoon sugar (optional, to activate yeast)
- 1 egg (for egg wash, optional)
Instructions:
Step 1: Activate the Yeast
- Time: 5-10 minutes
- In a small bowl, combine the warm water and sugar (if using). Sprinkle the active dry yeast over the top of the water and stir gently to dissolve. Let the mixture sit for 5-10 minutes, until the yeast becomes frothy and bubbly. If the mixture doesn’t foam, the yeast may be expired, and you’ll need to try again with fresh yeast.
Step 2: Mix the Wet Ingredients
- Time: 3-5 minutes
- In a large mixing bowl, combine the buttermilk, honey, softened butter, and vegetable oil. Stir well until the butter is mostly melted and the ingredients are combined.
Step 3: Combine Wet and Dry Ingredients
- Time: 5 minutes
- Once the yeast mixture is ready, add it to the wet ingredients in the bowl. Stir gently to combine.
- In a separate bowl, whisk together the flour and salt.
- Gradually add the dry ingredients to the wet ingredients, stirring constantly. Keep stirring until the mixture forms a dough. The dough should be slightly sticky but not too wet.
Step 4: Knead the Dough
- Time: 8-10 minutes
- Turn the dough onto a floured surface. Knead it for 8-10 minutes, adding small amounts of flour as needed, until the dough is smooth and elastic. If the dough feels too sticky, you can add a little more flour.
- Shape the dough into a ball and place it into a lightly oiled bowl. Cover the bowl with a damp kitchen towel or plastic wrap.
Step 5: Let the Dough Rise
- Time: 1-1.5 hours
- Allow the dough to rise in a warm place for about 1 to 1.5 hours, or until it has doubled in size. This is the first rise.
Step 6: Shape the Dough
- Time: 5-10 minutes
- Once the dough has risen, punch it down gently to release the air. Remove the dough from the bowl and place it onto a floured surface.
- Shape the dough into a loaf. You can do this by rolling it out into a rectangle and then folding the edges inward and rolling it up, or by simply folding the dough over itself and pinching the edges closed.
- Place the shaped dough into a greased 9×5-inch loaf pan.
Step 7: Second Rise
- Time: 30-45 minutes
- Cover the loaf pan with a kitchen towel and allow the dough to rise for a second time, about 30-45 minutes. It should rise until it’s about 1 inch above the rim of the pan.
Step 8: Preheat the Oven
- Time: 5 minutes
- Temperature: Preheat your oven to 375°F (190°C).
Step 9: Bake the Bread
- Time: 25-30 minutes
- Once the dough has completed its second rise, brush the top of the loaf with an egg wash (1 beaten egg mixed with a tablespoon of water) for a golden, glossy finish. This is optional, but it gives the bread a beautiful crust.
- Place the loaf in the preheated oven and bake for 25-30 minutes, or until the top is golden brown and the loaf sounds hollow when tapped on the bottom.
Step 10: Cool the Bread
- Time: 10-15 minutes
- Once the bread is baked, remove it from the oven and let it cool in the pan for about 10 minutes. Afterward, transfer it to a wire rack to cool completely.
Step 11: Serve
- Time: Immediate or room temperature
Once the bread has cooled, slice it and serve it warm with a bit of butter or honey. It’s perfect for breakfast, as a sandwich bread, or served alongside soups and salads.
Notes and Tips:
- Honey Variations: You can experiment with different types of honey for varying flavor profiles. Clover honey will give a mild sweetness, while wildflower honey may offer a more complex flavor.
- Buttermilk Substitute: If you don’t have buttermilk, you can make a substitute by adding 1 tablespoon of lemon juice or vinegar to 1 cup of milk and letting it sit for 5-10 minutes.
- Storing the Bread: Store the cooled bread in an airtight container or plastic bag to keep it fresh for up to 3 days. You can also freeze the bread for up to 3 months by wrapping it tightly in plastic wrap and aluminum foil.
- Add-ins: If you want to make the bread even more special, you can mix in some herbs like rosemary or thyme, or even add in some cheese for a savory twist.
- Sweet Variation: For a slightly sweeter version, increase the honey to 3 tablespoons, or drizzle honey on top of the bread after baking for extra sweetness.
Nutrition Information (per slice, assuming 12 slices per loaf):
- Calories: 140-160
- Fat: 5g
- Carbohydrates: 22g
- Fiber: 1g
- Sugar: 6g
- Protein: 3g
This Honey Buttermilk Bread is soft, slightly sweet, and wonderfully comforting. The addition of buttermilk makes it tender and moist, while the honey adds a delicate sweetness. It’s the perfect bread for any occasion and will quickly become a family favorite! Enjoy!

Hayyat is a talented content writer and digital marketer with expertise in SEO, social media management, and online marketing. She excels at creating impactful, data-driven content to help businesses connect with their target audience and achieve measurable outcomes.


