Prep Time: 15 minutes
Cook Time: 25 minutes
Total Time: 40 minutes
Servings: 6-8 slices
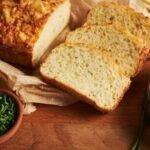
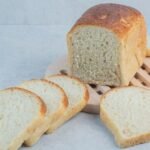
This no-oven stovetop bread is the perfect solution for when you don’t want to fire up the oven but still want a warm, freshly-baked loaf of bread. The beauty of this recipe lies in its simplicity—using just a few pantry staples, you can whip up a soft, fluffy bread that’s golden-brown on the outside and tender on the inside. Plus, you don’t need a bread machine or any special tools—just a pan and a stovetop!
Ingredients:
- 2 cups all-purpose flour
- 1 tablespoon baking powder
- 1/2 teaspoon salt
- 1 tablespoon sugar (optional, for a touch of sweetness)
- 3/4 cup milk (whole or 2%)
- 3 tablespoons unsalted butter, melted (plus extra for greasing the pan)
- 1 large egg
- 1/2 teaspoon vanilla extract (optional, for a subtle flavor boost)
For Serving (optional):
- Butter or olive oil
- Honey, jam, or your favorite spread
Equipment Needed:
- Large mixing bowl
- Whisk or spoon for stirring
- Stovetop-safe non-stick skillet or frying pan with a lid
- Spatula or tongs
- Measuring cups and spoons
Instructions:
Step 1: Prepare the Batter
- Mix the dry ingredients:
In a large mixing bowl, combine the flour, baking powder, salt, and sugar (if using). Stir the dry ingredients together to ensure they’re well-distributed. - Add the wet ingredients:
In a separate bowl, whisk together the milk, melted butter, egg, and vanilla extract (if using). Add the wet ingredients to the dry ingredients and stir until a soft dough forms. You may need to add a little extra flour if the dough is too sticky or a tiny bit more milk if it’s too dry. The dough should be thick but manageable.
Step 2: Cook the Bread on the Stovetop
- Heat your pan:
Place a large non-stick skillet or frying pan on the stovetop over low to medium heat. Add a little butter to the pan and allow it to melt. You don’t need a lot, just enough to coat the bottom to prevent sticking. - Shape the dough:
Turn the dough out onto a lightly floured surface and gently knead it a few times (about 3-4 folds) until it comes together. Shape the dough into a round or oval shape that will fit comfortably in your skillet. If the dough is too sticky, dust it lightly with some flour. - Cook the bread:
Place the shaped dough into the skillet. Cover the skillet with a lid, leaving a small gap for steam to escape. This helps the bread cook evenly and prevents the top from becoming too dry. Cook for about 10-15 minutes on the first side, checking occasionally to make sure it’s not burning. The bread should start to rise and get golden brown. - Flip the bread:
Once the bottom is golden and the top looks set, use a spatula or tongs to carefully flip the bread over. Cover the skillet again and cook for another 10-15 minutes on the other side, until the bread is fully cooked through and golden on both sides.
Step 3: Check for Doneness
- Test the bread:
The bread is done when it sounds hollow when tapped on the top or bottom. You can also insert a toothpick into the center—if it comes out clean, your bread is ready. - Cool slightly:
Remove the bread from the skillet and place it on a wire rack or cutting board to cool for a few minutes before slicing. This helps the texture set and prevents it from falling apart when you cut into it.
Step 4: Serve
- Slice the bread into wedges or slices. Serve warm with butter, jam, honey, or your favorite spread.
- This bread is perfect for breakfast, as a side with soup, or even as a base for sandwiches.
Notes:
- Pan Size: Make sure to use a skillet or frying pan that has a lid. A large 10-12 inch skillet works best. If you have a smaller pan, you may need to cook the bread in batches or make smaller portions of dough.
- Heat Adjustment: Cooking times may vary depending on the size and material of your skillet and the heat of your stovetop. Keep the heat low to medium to avoid burning the bread before it’s fully cooked. If your bread is browning too quickly, reduce the heat.
- Flavor Add-ins: For an extra twist, you can add herbs (such as rosemary or thyme), cheese (like shredded cheddar), or even a handful of dried fruit or nuts to the dough before cooking.
Variations:
- Sweet Version: Add 1/2 teaspoon cinnamon and 2 tablespoons of honey or maple syrup to the batter for a lightly sweet flavor. You could also fold in some chocolate chips or dried fruit.
- Garlic Herb Bread: Add 2-3 cloves of minced garlic and 1 tablespoon of chopped fresh herbs (like rosemary or thyme) to the dough for a savory, aromatic bread.
- Cheese Bread: Stir in 1/2 cup of grated cheese (cheddar, parmesan, or mozzarella) for a cheesy version of this bread.
This no-oven stovetop bread is incredibly versatile and makes for a quick and easy homemade treat. It’s a great option when you don’t want to wait for the oven to heat up, or when you just want a simple, warm loaf without much fuss. Enjoy!

Hayyat is a talented content writer and digital marketer with expertise in SEO, social media management, and online marketing. She excels at creating impactful, data-driven content to help businesses connect with their target audience and achieve measurable outcomes.


